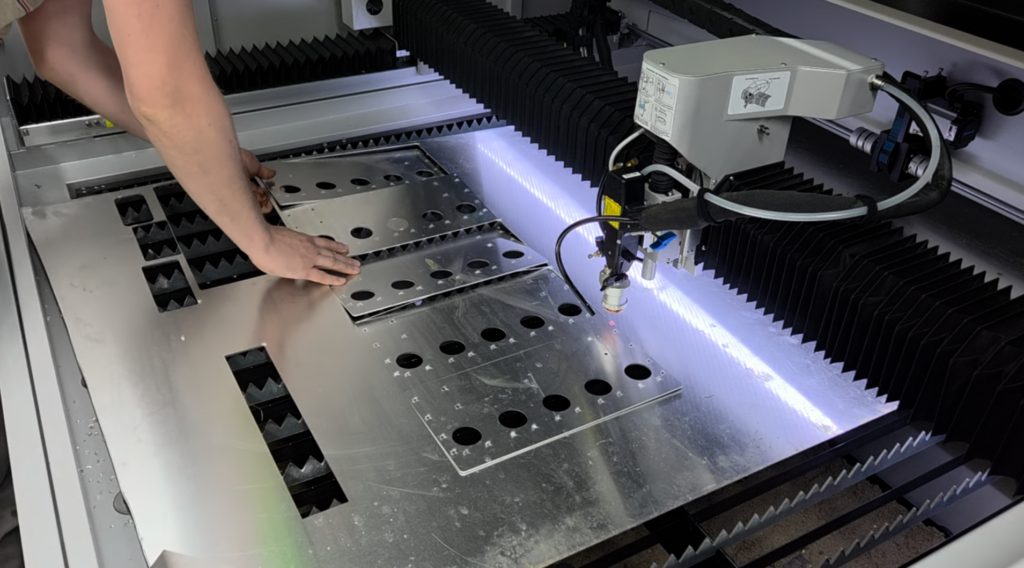
The vise of my manual mill weighs more than this whole machine. So when a desktop CNC like the Makera Z1 Pro says it can do metal, I want to see it in steel. Not for five minutes, but for a whole part.
This post goes with the full video on YouTube. It has my feeds and speeds in a table you can copy, every problem I ran into, and what I did about each one.
Makera supplied this Z1 Pro and saw the video before release. They didn’t pay for it and asked for no changes. The tests and conclusions are mine.
My Makera Z1 Pro feeds and speeds for C45 steel
These are the settings I ended up with after six evenings: C45 steel, air blast, spindle at 13,000 rpm, carbide end mills.
| Cut | Tool | Feed | Engagement |
|---|---|---|---|
| Bore, helix down | 4 mm 4F carbide | 400 mm/min | 3 mm helix, 0.04 mm/rev |
| Bore, spiral out | 4 mm 4F carbide | 2,600 mm/min | 0.05 mm deep, 4 mm wide |
| Top face | 4 mm 4F carbide | 2,600 mm/min | 0.05 mm deep, 3.8 mm wide |
| Finish passes | 4 mm 4F carbide | 2,000 mm/min | 1 mm pitch helix, 0.1 mm radial |
| Back face | 6 mm 4F carbide | 2,600 mm/min | 0.06 mm deep, 3.5 mm wide |
| Chamfers | 6 mm 90° 2F carbide | 300 mm/min | 0.2 mm, then 0.3 mm |
At 13,000 rpm with four flutes, 2,600 mm/min is 0.05 mm per tooth. The cut is shallow but almost as wide as the end mill. That’s not ideal for tool life, because you only use the tip of the end mill. On a light machine it gives a much smoother cut.
My rule: find the maximum first, then back off about 20%. That’s where the results get good.
One more tip: before a cut like this, I restart the program a few lines back so it eases into the material. Start in the wrong spot and a 0.1 mm cut suddenly becomes 0.5 mm.
What Makera recommends instead
I asked Makera about the heat. Their advice for steel: 11,000 rpm and 1,000 mm/min. That’s less than half my feed rate, so the same toolpath takes more than twice as long.
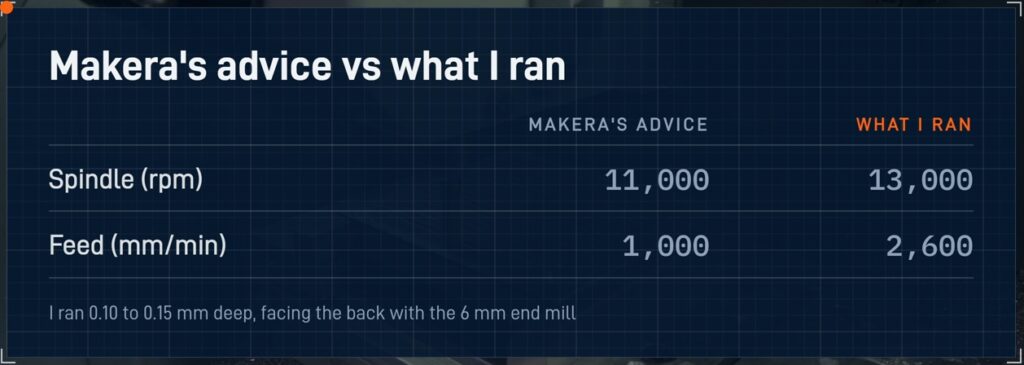
If you want the machine to run cool and don’t mind waiting, start there. I’m not making money with this machine, but my time is still worth something.
The test part
The part is a block of C45 steel: 74 by 74 mm, 12 mm thick, with a big bore in the middle. Boring and side milling let me compare deep, narrow cuts with wide, shallow ones. Then a second setup to take 7 mm off the back.
Short runs are easy. I wanted to see how the Z1 Pro holds up over hours of cutting, and what goes wrong after that.
Every problem I hit
The bore and the helix angle
The bore was the hardest part. I started with a 1.5 degree helix and ended at 0.25 degrees. The steeper the helix, the more it bites on every turn, and on a light machine that’s one of the hardest cuts. I still don’t know which angle is best.
My settings mistake
I simulate my cuts in Millalyzer, which shows the cutting force on the end mill. Around 10 newtons is my sweet spot, and the graph looked nice and stable.
Then the cut started to whine. I had swapped cutting depth and cutting width in my settings, so it was cutting way too hard. The graph was right, my settings were wrong. A cut narrower than the end mill makes the force keep swinging, and this machine has no mass to damp it.
The fix was a new strategy: almost the full width of the end mill and much less depth. That’s what’s in the table above.
Chips inside the machine
On the second evening the spindle kept overheating. After some googling, clogging seemed to be a known issue, and when I looked, mine had way more chips inside than I expected. Steel chips are like little needles. Cleaning them out is part of running steel on this machine.
Spindle heat
Heat was the real limit. While taking 7 mm off the back, the spindle temperature kept climbing towards 75°C. At 75°C it stops, and then you reset and probe everything again.
What I tried: the fan at 100%, the feed override down to 80%, and the vacuum on for more airflow. The vacuum actually made it warmer. What worked: pause, let it cool with the fan at max, go back to my old cut parameters and back off the feed.
I was only removing about 1 cm³ per minute. You can go much slower, but then a part like this takes a day, and this isn’t a machine you leave alone for eight hours. I think the pre-production Z1 handled heat better. The Pro is easy to overheat.
Probing a crooked vise
Something on my vise was crooked, so the part was too. My own probing app, which drives the probe through Makera Studio, has a Reference Plane feature: it probes the tilt and builds a height map to compensate. This was the first time I used it on a real part.
Y axis motor error
The axis motors are closed loop. If they lose position, the machine stops the job. Mine stopped with a Y axis motor error and wanted a reset. After a reset you have to probe again, because you don’t know if everything is still where it should be. I restarted it and after that it was fine. I don’t know what caused it.
The probe died
On the last evening, while probing the bore, the Makera 3D probe died. No light, no signal, and the machine didn’t know. It drove the probe into the part. I had no spare, so the part is still not quite finished.
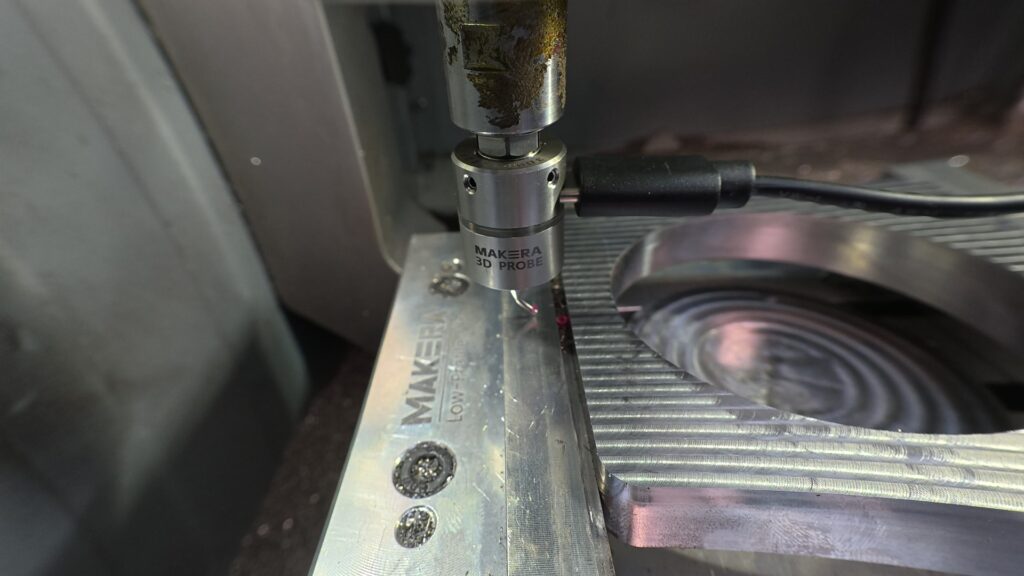
That clip became a Short with nearly 3 million views across YouTube, TikTok and Facebook. Most comments said user error. Mine had done about 300 probing cycles, and this time it just didn’t trigger.
Makera told me the firmware doesn’t check yet whether the probe still works, and that a fix is coming. They’re sending me a new probe. The whole story is in my post about the dead probe.
Until that fix is out: trigger the probe by hand before every probing routine and check that the machine sees it.
Chips in the linear guides
After the part, I looked under the covers. Black oil mixed with fine metal dust on the linear guides, and plenty of chips hanging on them. The chips are too heavy to get carried away. If you run steel, plan on cleaning.
How accurate is the part?
In the machine, my probe measured the outside at 74.01 by 74.01 mm. With calipers on the finished part: 73.95 to 74.00 mm on a 74 mm target, and about 0.1 mm off on the 12 mm thickness. No calibration, no wear compensation. For a machine like this, with these settings, that’s plenty good.
The bore is hard to measure properly with calipers. Next time I’d probe it on the machine.
The finish: the bore is very smooth, the outside faces are nicer than the top because I ran a finer finishing pass there, and the chamfers came out clean. On the top face you can feel the passes with a fingernail.
So, can the Makera Z1 Pro cut steel?
Yes. It works great, especially for finishing, even in steel. I pushed it hard on purpose to find where it stops.
It’s slow and heat is the limit, so plan for long jobs, chip cleaning and a few resets. Whether it’s worth the money is the next video. Before this one, I opened up a pre-production Z1 to see what’s inside.
What I used
🔥 Makera Z1 / Z1 Pro: see today’s price →
FAQ
Got questions about steel on the Z1 Pro, or want my probing app? Join the Discord and let’s talk shop.